CEREC CAD-CAM Restorations
Jump to section
Image 01
Image 02
Image 03
Image 04
Image 05
Image 06
Image 07
Image 08
Image 09
Image 10
Image 11
Image 12
Image 13
Image 14
Image 15
Image 16
If you’re ready to take the next step towards a healthier, happier smile, book your appointment with us today.
A series of images to show the stages of a CREC CAD-CAM Restoration.
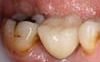
Image 01
Deep cavity under the gum, usually very difficult to treat

Image 02
Completed inlay.

Image 03
Xray on completed inlay showing excellent fit in the deep area.
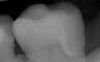
Image 04
Broken old metal/ceramic crown.
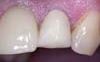
Image 05
Cerec crown straight from milling chamber showing excellent fit.
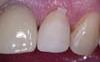
Image 06
Completed cerec crown.
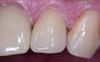
Image 07
Old amalgam filling with decay front and back.
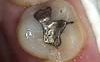
Image 08
Midway through cavity preparation showing areas of decay.
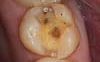
Image 09
Completed cerec inlay.
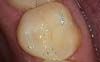
Image 10
Heavily filled and fractured tooth.
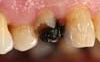
Image 11
Completed cerec crown with characterisation added to make more realistic.
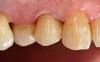
Image 12
Implant healing head.
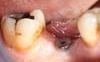
Image 13
Zirconia custom-preppable abutment placed and sealed.
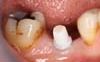
Image 14
Xray showing great fit to abutment.
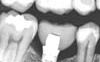
Image 15
Cerec crown ready for firing.
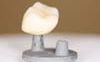
Image 16
Completed cerec implant crown.